Showing posts with label Rustoleum. Show all posts

Thursday, September 29, 2016

Little Diva Table

I'm down in San Antonio for a dentist appointment, and got a contract on my newest flip house, so I'm going to hang out here through the inspections to see if I need to make any repairs.  I'm staying at Tera's house, and we both have had dentist appointments.  I got a temporary crown yesterday, and Tera was going to go tonight for one, and before she left, I bit into some Cheese Bread from Little Caesers, and my new temporary came off in two pieces.  BREAD?  Anyway, I guess I'll go back to the dentist tomorrow, but for tonight I want to share about the Little Diva Table.  I planned it for a little girl's bedroom.

I picked up four items at the Ladies Center one day, and two of them were 1950's Mid Century lamp tables.  Much smaller than we use today, and two tiers.  Both were brown wood, and Tera wanted one to make a block table.  So loving folk paint, I kept one to make the little Diva Table.  Not a lot of planning went into it.  I let the creative juices flow and looked at a lot of pictures of other tables at the website Decorative Paintbrush (love these gals' furniture) to get ideas.


I first covered the table with chalk paint (my last time to use it) so that I wouldn't have to sand it.  Then after 2 coats, I put my semi gloss white I keep around the house, several coats for depth.  Then I let the creative juices start.


I started at the bottom of the table with the curved legs and the cross bars, and chose four colors to use.  I painted them solid and then later started designing some designs for them.   Then I moved up to the big shelf and did some designs around the edges and painted a big butterfly (stenciled it on and then painted it).  Next I painted the legs of the upper tier, and finally the top tier which is half as big as the bottom shelf.  My daughter had made me buy these tables because they were identical to ones my Mom had.  She's now deceased, but we both had feelings for these tables, even though this one no long resembles Moms.  While I was painting this table, and it did take weeks, as I was letting artistic juices work when the urge hit - so I had the table sitting in the kitchen for a while, - my granddaughter, who was 2 at the time, loved to use it as a ladder to stand on to get up to the bar to see what was up there.  Anyway you will see from the pictures that the top tier I used a sponge and dabbed on a blue sky,  and dabbed on butterflies using stencils and using a brush put black lines to make them to appear to be flying.  I use acrylic paints from Michaels for all artwork, and the stencils from there too.  I used a lot of painter's tape to get the lines straight where I stopped colors.


Taped off the area where butterfly went.

Stencils were used for checkerboards under top tier.  Hand painted the little flowers and hearts down the sides.

See the thin pink line around top tier.  It's little things like that which make it unique.


After all the artwork was finished, the table was sprayed with clear gloss Rustoleum from Lowes, to set the acrylic.  You could not brush it on as the acrylic would smear.  Once I got the gloss over the acrylic, I added several layers of polyurethane with a brush for protection from wear and tear, and then one more coat of spray gloss.  Remember these last layers add shine and protection. 

This table has traveled with me to San Antonio two times as staging tools.  The lady who bought my first house wanted me to include it in the sale, but I wouldn't.  I'd sell it for $75 to someone, but I'm not throwing it into a sale.  It is now serving as the sidetable in the little girl room of the house I got a contract on today!!!
 
I think I had more fun painting this than anything I've ever painted.  I just had fun putting lines, hearts, checks, butterflies, just anything I wanted.  Folk art for sure. 


Monday, September 19, 2016

Zebra Drink Cart

The zebra bar cart used as staging that I will tell you about in this blog.  This fireplace was a solid white when I bought the house, and the floor was blonde laminate,  yellow walls now gray with new texture and new 5 inch baseboard.  This is what I do for $$.
 

Judy here again.  I've been busy on a project this week, making a cat house/bed out of a hexagonal side table. HOWEVER, that is not what this is about. 

A few years ago, I discovered that the Ladies Center here in Amarillo takes donated furniture, clothes, baby supplies, art, purses, lamps, almost anything, and sells them really cheap.  I forget what I went in looking for, but I found a cute little book cart.  I had been watching Flea Market Flip a lot, and I had seen a lot of bar carts being made out of lots of different pieces of furniture, and when I saw that book cart, I thought:  bar cart.  Not that I needed one, as I don't drink; but I knew it would work for staging (and I'm using it right now in my house in San Antonio that's for sale) or I might sell it. 

I also knew that I had been wanting to do something in zebra print.  I found a small zebra painting on line, and got myself a canvas and practiced doing a zebra print on it, and yes, I could paint zebra print.

Needless to say, I bought the book cart, and took it home. 


As you can see it was wood and brown.  This was my first attempt at chalk paint.  I bought white at Michaels and started painting the book cart.  The reason I chose it was that it said you would NOT have to sand, and if there is one thing I hate doing, it is sanding.   Let me tell you that it was not a good experience for me.  I hated it.  I hated the look it created, all bumpy, dull and looked as if it needed sanding, which defeated my purpose of using it.  I read online that you are suppose to buy a wax to put on it, and I didn't feel comfortable with that.

So I lightly sanded the chalk paint which I had put 2 coats of on the book cart, and I then repainted it with my  white semi gloss paint I keep on hand for touch ups on my trim.  I liked that look much, much better.  I put several coats of white.

Chalk paint.  Yuck.
 

Semi gloss interior paint


Next I looked at my zebra canvas and copied that on both sides of the cart. 

Just before I tried the paper, see it on bar.


 Then I bought zebra wrapping paper and tried to decoupage it on the shelves, but that was disastrous.  Too flimsy; wouldn't stick, didn't go on smooth like wallpaper would have.  SO I TOOK IT OFF.  I had a carpenter over working outside, and he had seen what I was doing  While he was outside, I decided to just paint the zebra print onto the shelves like I had the sides.  I looked at the paper and my canvas while doing it.  Took about  thirty minutes.  My carpenter came in and said the paper looked good on the shelves as he saw the paper hanging off the bar.  I told him I had painted it, rather than using the paper, and he was so surprised.  He said it looked just like the paper!!  Success!

Just the top painted, but see how I tried to get stripes on sides and top to look like they are continuous.


Close up of how the zebra painting looks.


Next I painted the edges of the shelves black.

Next I spray painted two coats of clear gloss (Rustoleum brand) on all of the cart to give it shine.  Finally, I thought I was through, but someone told me they'd be interested in buying it from me if I added some "BLING".  So I went to Michaels and found some little strips of tiny rhinestones that are self sticking and came back and scattered them across the top and down the sides.  Since that day, my littlest grandson got hold of it while it was holding my t.v. in the converted garage I stayed in while remodeling the house in San Antonio, and picked some of them off before I saw him, so it is now missing some of the rhinestones, and if I ever decided to sell it; I'd have to get some more and put on it.  I never did send the new picture of it with rhinestones or bling to the lady.  I think I just wasn't ready to part with it.
This is it in the converted garage I lived in while remodeling it. 


Black front


All in all, I probably spent less than 3 hours working on this project; one of the quickest and cheapest I've done.  I got the book cart for $15 and I used paint I already had on hand.  I bought the wrapping paper and glue for decoupage, and I bought the rhinestones.  That's it.  That's all that I spent.  I think its elegant.

Wednesday, August 31, 2016

A Fan of Spray Paint

Judy here.  Just got home from San Antonio, to Amarillo, through rain storms, floods, and a 9 hour drive.  But as I drove, I thought about this blog and things I want to share.


For those of you who are not experienced at all with furniture re-dos, let me tell you that the easiest way to paint furniture is for outside.  Why? you ask.  Because for outside you can use spray, enamel paint (heavy on the fumes, so do it outside) which will make it weather well.  Using enamel based paint with a brush is hard because you have to have paint thinner to clean the brush (more fumes) and it takes time to clean those brushes, plus enamel shows brush strokes.  Even if I use poly or enamel paint, I'll usually finish with a layer of spray varnish or paint to fill in those brush strokes.


Rustoleum 2x in many colors and clear (gloss or satin) is my favorite.  They cost about 3.50 a can at Walmart, Lowes, Home Depot, etc.  Now if you really want to save money, Walmart has a brand (Tera says is good and I don't remember the name and it's usually on bottom shelf) for under $2. 


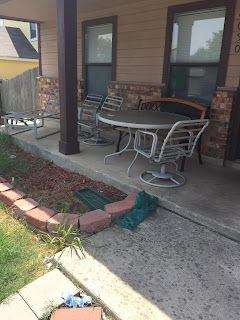
I recently did 3 chairs and a table for the sun porch, using 4 colors, one for each item separate, using the colors in the pillows to draw it all together.  I used 1 1/2 cans of paint per chair. 


Now on the lawn furniture I spread a drop cloth in the yard on the grass.  And I had to clean each chair a lot with the water hose, as they were really, really dirty and spider-web covered. I got the whole set including a lounger at a garage sale for $40. 
 On the first chair, I goofed and set it up as you sit in it and painted it, and after it dried flipped it upside down.  DO NOT DO THAT, because then you can ruin your fresh paint job!  So on chairs 2 and 3 and the table I started it upside down, and after dried flipped and did it as it sits.  After they dried I repeated those steps because I missed spots.  Usually I would then cover with clear gloss, but since these were staying in the screened in sun porch, I decided not to do that.
Dirty chair, as all were dirty.


  I then found 3 sets of pillows at Walmart on sale for $5 each and chose different sets with similar colors (Walmart was so sold out they didn't have 3 of any one pattern).  I tried to Velcro the backs to the chairs, but they were too heavy, so they just sit up on the bottom pillow. 


But back to the spray paint, be very sure to continually move the can around as you spray or it will go on too thick and run.  If it runs and you see it, grab a brush and spread it out while wet.  If you miss it and it dries, you might have to sand it down.  Sometimes I just peel it off with my fingers and lightly repaint those spots.  I like a back and forth movement, but Tera uses a squirt, move, squirt move, pattern.  I probably waste more paint in the back and forth and possibly get lines, but its my method, and its the same method my son uses when using a paint sprayer for walls. 


I have now done 3 outside sets.  I remodeled a home for an elderly couple a few years back and they had a park bench.  I spray painted those.  I also spray paint hardware.  Tera did the hooks on the coat tree from last blog; she also sprayed all the hardware on the kitchen cabinets on a house we flipped last year in San Antonio and the front doors on both San Antonio flip houses.  I sprayed hardware on the cabinets in the elderly couple's house.  It makes them look brand new.  It's amazing how style isn't the culprit on hardware, but color.  Right now nickel is hot.  In the 70's it was bronze.  Bronze screams 70's.  There are lots of things you can spray paint, and if you are just starting this hobby, start with spray paint.  Tera has done quite a few desks and they always look amazing.  More on those in the future, as Tera buys a lot of desks and filing cabinets from auctions and always makes them look fun, modern and colorful.  She did one filing cabinet with superheroes on each drawer.  But I'm sure she'll want to show you some of her work.  She probably won't write as often as me, as she is taking care of 4 boys, and one is only 2 (yes, terrible twos.  He's the size of a 5 year old but as active and inquisitive as a 2 year old!!) 


 I could probably go on and on about what all we've spray painted, but just know that it's easy, cheap and can make anything look better (remember the commercial where the lady buys the lawn chair and bike for next to nothing, spray paints it and resells it to the original owner for 10x what she paid.  Yes, it is true.  Rejuvenate with inexpensive spray paint, which dries super fast, and have a project done in a day.  I did all 3 chairs and table in 24 hours!!


So that's my fan letter to spray paint, especially Rustoleum. Hope you learned something and feel inspired to get out there and paint something old to make it young again.